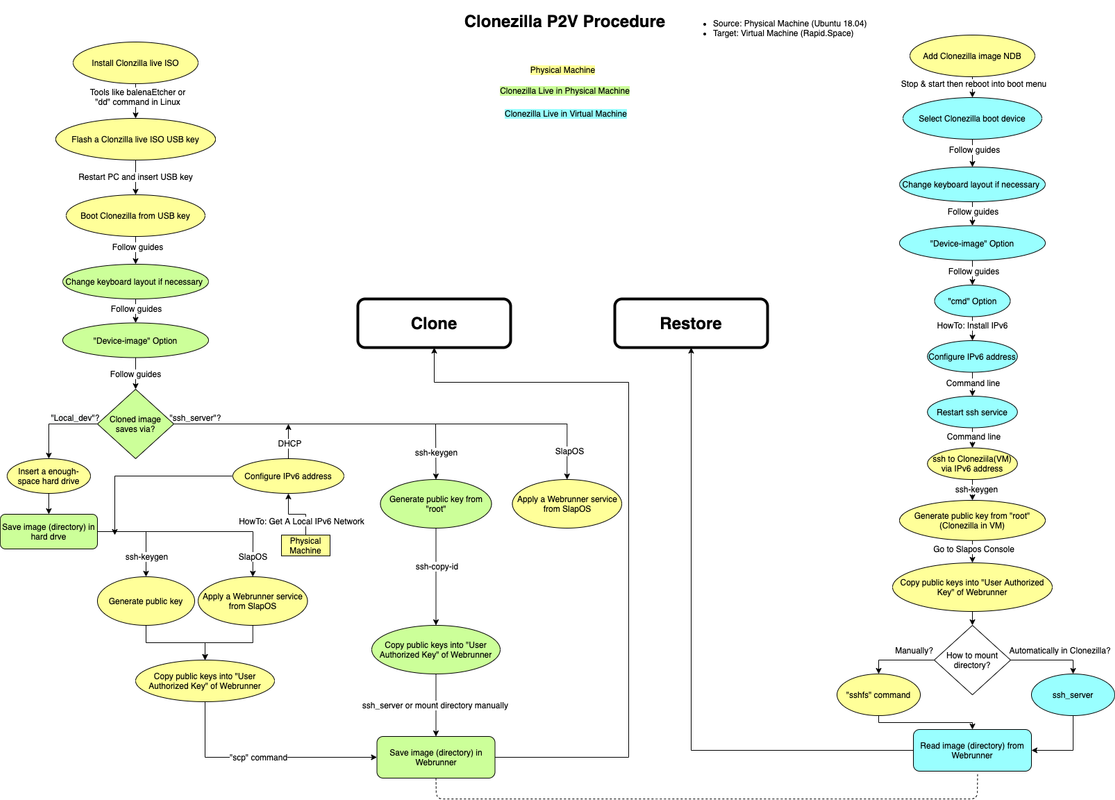
How to Migrate A Physical Machine to A Virtual Machine by Clonezilla
By providing a cheap, open, reversible cloud. Some people may want to know how to migrate their current running system to the rapid space VM. The actual migration depends on their current system (Physical machine or Virtual machine), and the tools they want to use(Clonzilla or virt-p2v). This tutorial going to explain how to use Clonzilla to do the physical to vitural machine migration(P2V).
Suppose you have a physical machine which running a Linux system (Ubuntu for example). And you want to migrate it to the Rapid.Space virtual machine (KVM). Now you want to use Clonzilla to help you to migrate your system.
Prerequisite:
- A USB disk
- A Hard drive with enough space (suggested)
- A physical machine prepared to be shutdown
- A Rapid.Space virtual machine (KVM)
Terms:
Source system: The system you want to migrate, e.g. the current Ubuntu 18.04 machine which you are using.
Destination system: The virtual machine you want to use, e.g. A KVM which running on the Rapid.Space.
Procedure preview:
Download and flash Clonezilla
Clonezilla Live is a small bootable GNU/Linux distribution for x86/amd64 (x86-64) based computers. It can be used to image or clone individual computers using a CD/DVD or USB flash drive.
First we need to download Clonzilla. Then, you need to put it in a boot media (CD, USB flash drive or USB hard drive). Two types of files are available, iso and zip.
In our case, we chose to dd tool on Linux to flash the drive. Of cause you can download iso file on Windows, then use balenaEtcher to flash it to an USB drive.
Flash Clonezilla by dd command:
-
Check the disk:
fdisk -fIf /dev/sdb is our USB disk, sdb1 and sdb2 are USB disk partitions.
-
Unmount the disk:
In oder to integrate partitions, we need to format the USB flash drive, and unmount the USB flash drive before formatting.
sudo umount /dev/sdb1Note: The device behind /dev/ should be determined according to your actual situation, otherwise data will be lost after formatting. For example, the location of the USB disk in this experiment is sdb1.
-
Format the USB disk and establish the vfat file system:
sudo mkfs.vfat /dev/sdb1note: vfat is actually the FAT32 file system format. After formatting, you can replug the USB disk, the system will automatically mount the disk and now we can use a formatted USB disk.
-
Check the location of the USB flash drive:
We will use this formatted USB disk to make a bootable USB disk system, and use the
ddcommand to copy the system image into the disk. Determine the location of the disk by typingdf -hin the command line to view the disk information:df -h # Result: Filesystem Size Used Avail Use% Mounted on /dev/sda1 119G 79G 34G 70% / none 4.0K 0 4.0K 0% /sys/fs/cgroup udev 7.8G 12K 7.8G 1% /dev tmpfs 1.6G 1.1M 1.6G 1% /run none 5.0M 0 5.0M 0% /run/lock none 7.9G 1.5M 7.9G 1% /run/shm none 100M 3.7M 97M 4% /run/user /dev/sdb1 15.8G 0.0G 15.8G 0% /media/user/LABEL -
Flash USB disk by
ddcommand:sudo dd if=/home/nexedi/clonezilla-live-2.6.6-15-amd64.iso of=/dev/sdb bs=4M status=progressNote: Don't need to write the partition number, such as sdb1 or sdb2.
status=progressis just for checking the progress.
Boot Clonezilla from USB drive to Clone
After you made a bootable Clonzilla USB drive. You need to reboot your physical machine, with the USB drive inserted. Change your BIOS to let your machine boot from the USB drive.
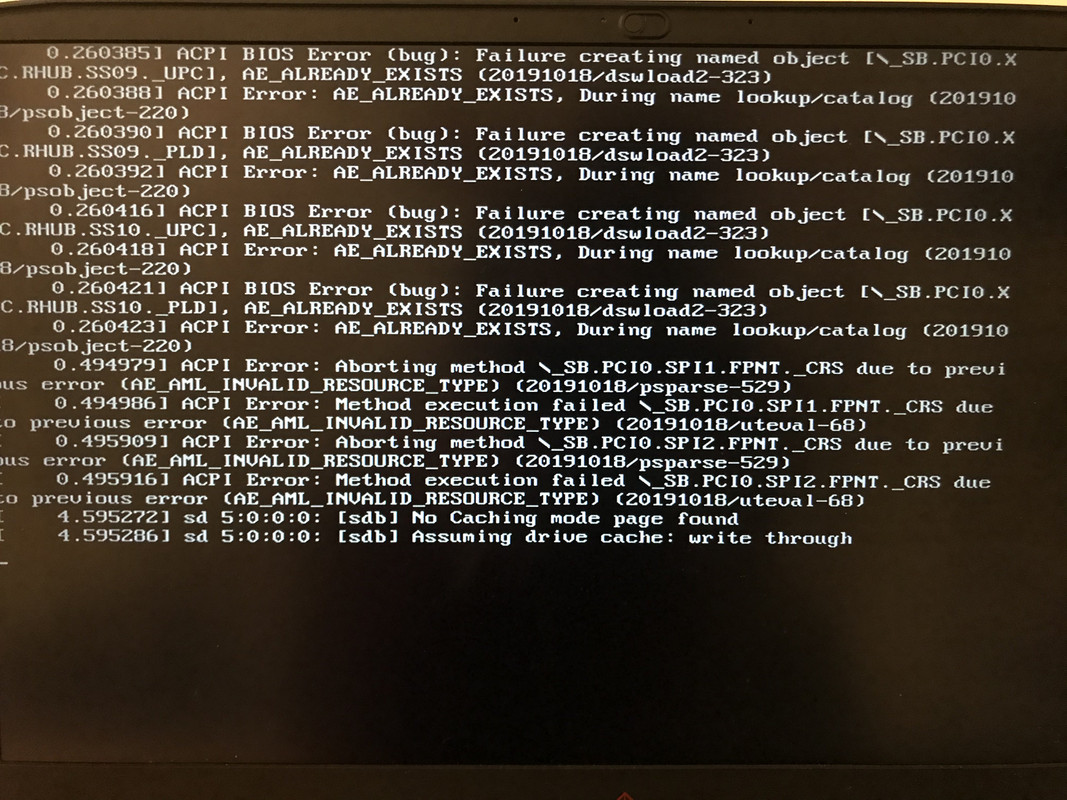
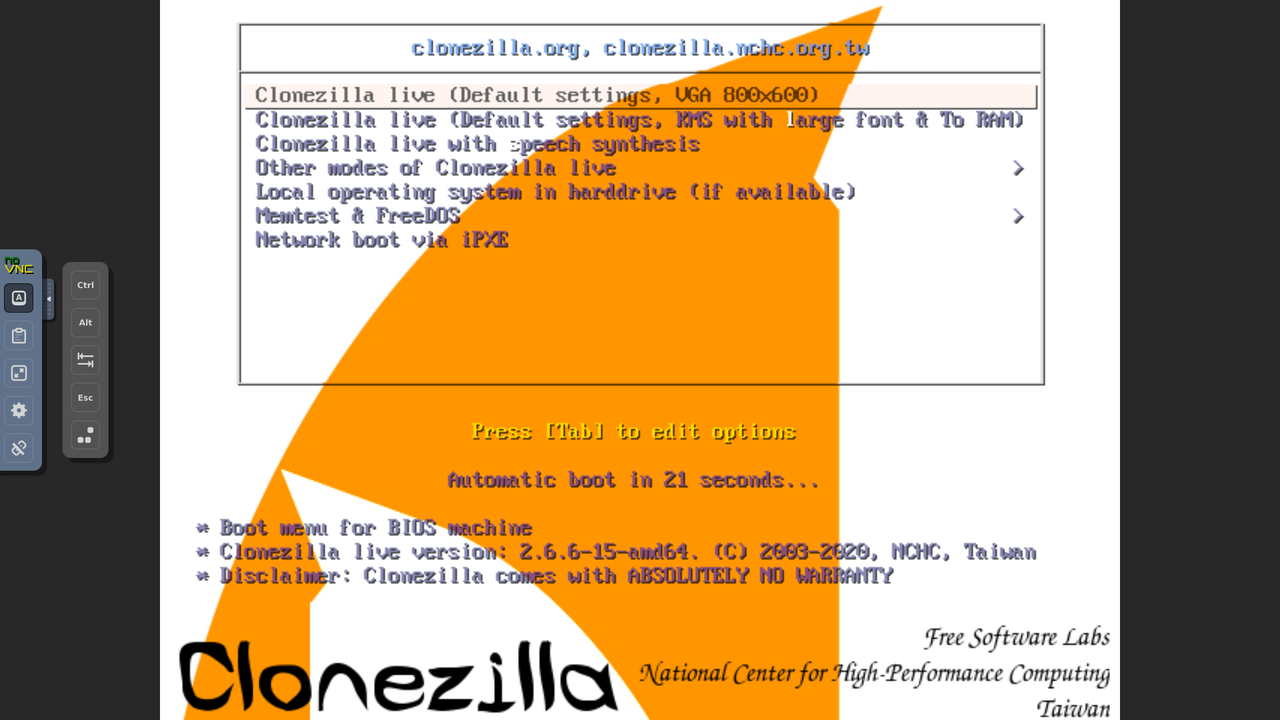
After the machine boot, you will see the bootloader menu which ask you to start Clonzilla:

It may load for a while:
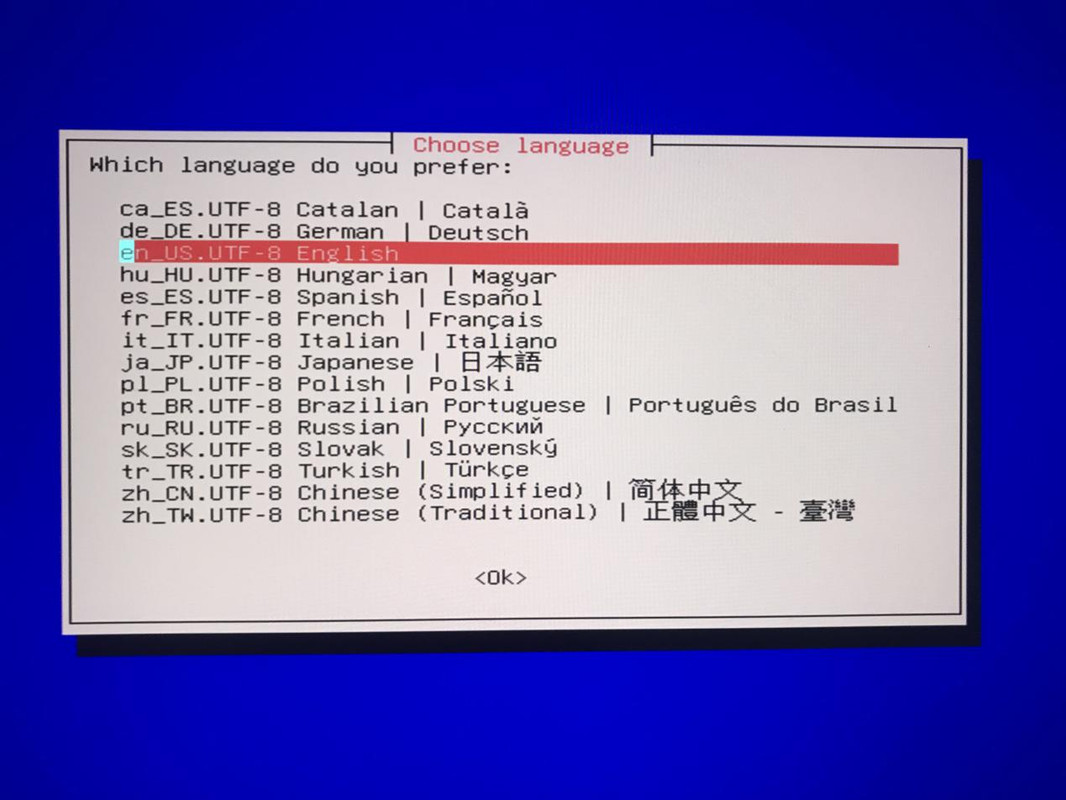
The next step is choose the interface language:
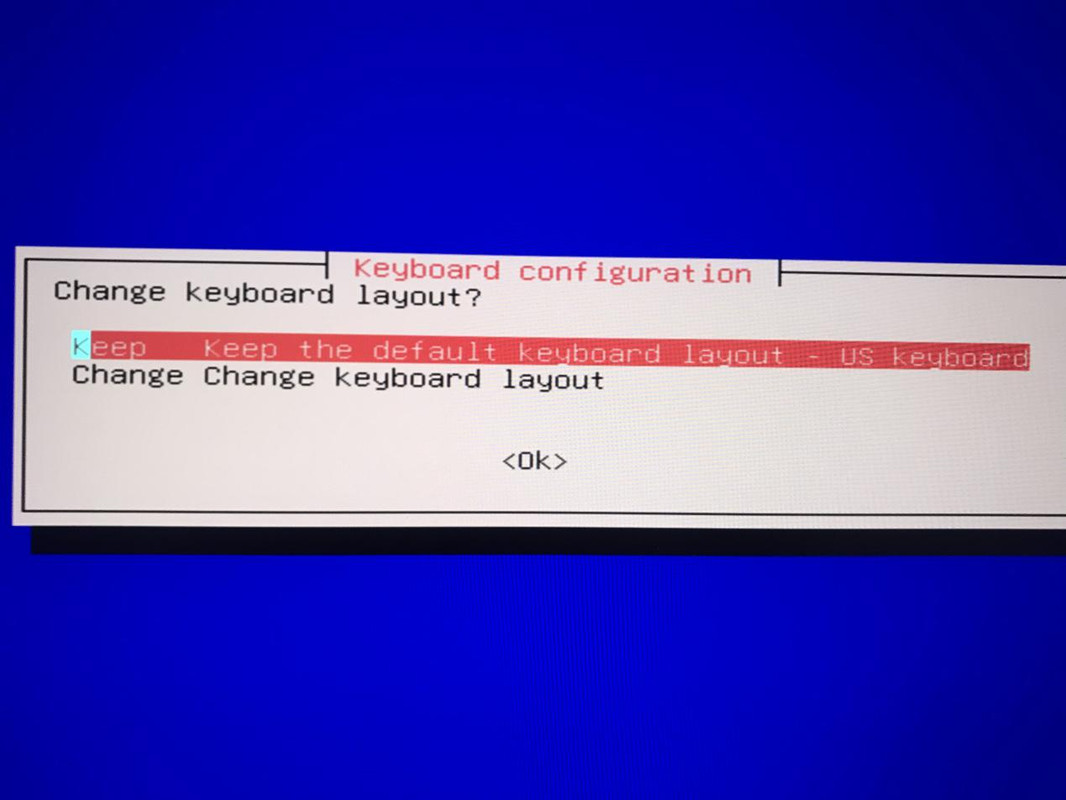
Then keep the default keyboard layout setting and start Clonzilla:

After finish the basic setup. We need to choose the clone type, in our case, we want to clone a disk and make an image for it, so we choose “device-image” option:

Option 1: Use Local Device to Save The Cloned Image (Suggested)
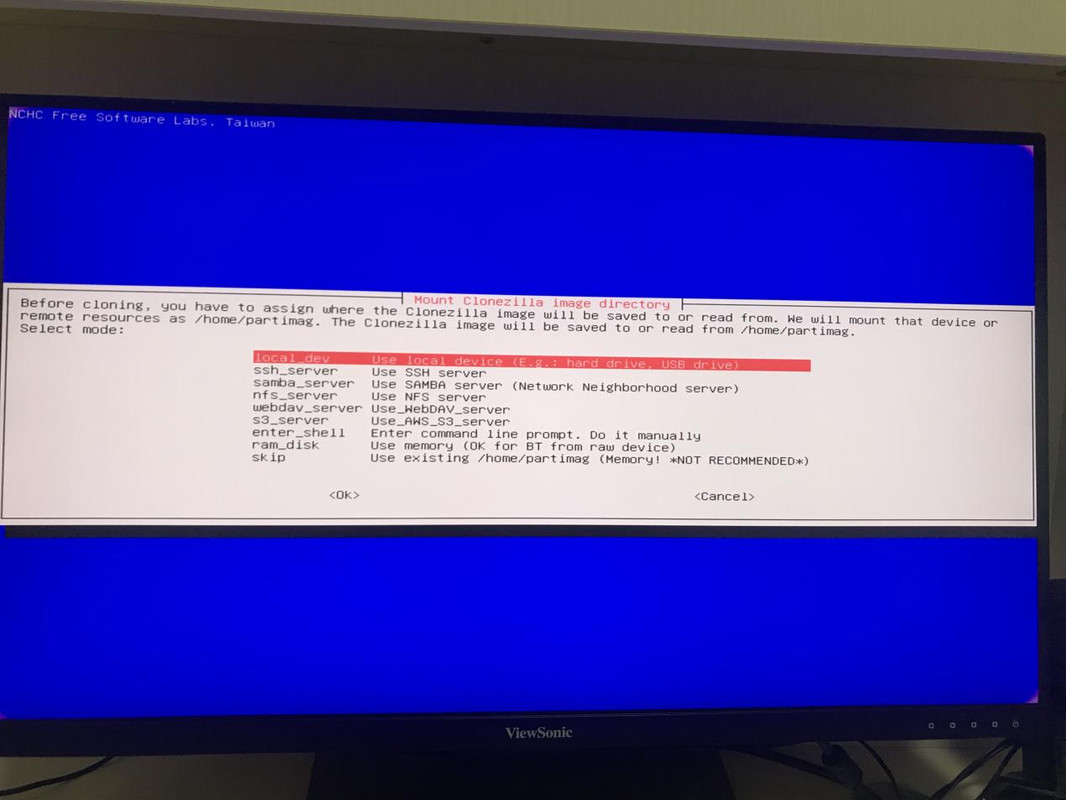
The next step is asking you to assign where the Clonezilla image will be saved. In our case, we choose to use local drive:
Then we will enter the step that asking us to provide a drive:
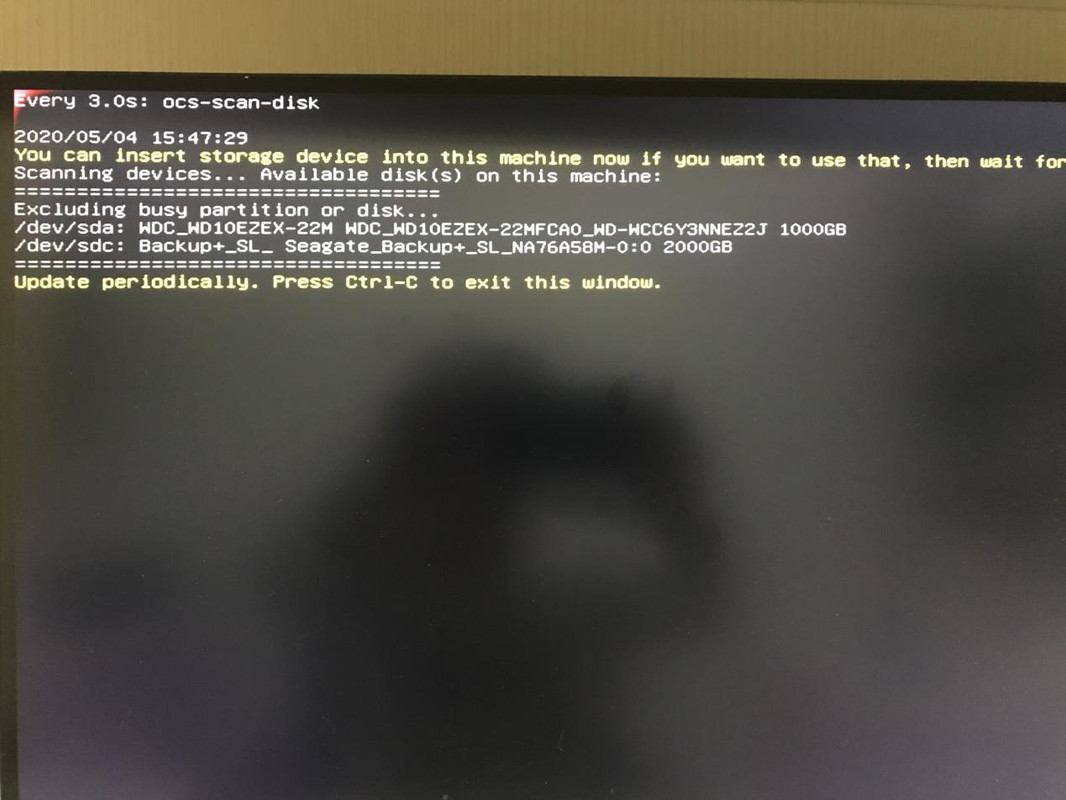
We insert the hard drive which we want to store the image (your data in the hard disk will not erased if it has enough space for the image), aka the copy of source system. After Clonzilla detected the new inserted drive, you will notice the hard disk you just inserted is at the bottom of the list.
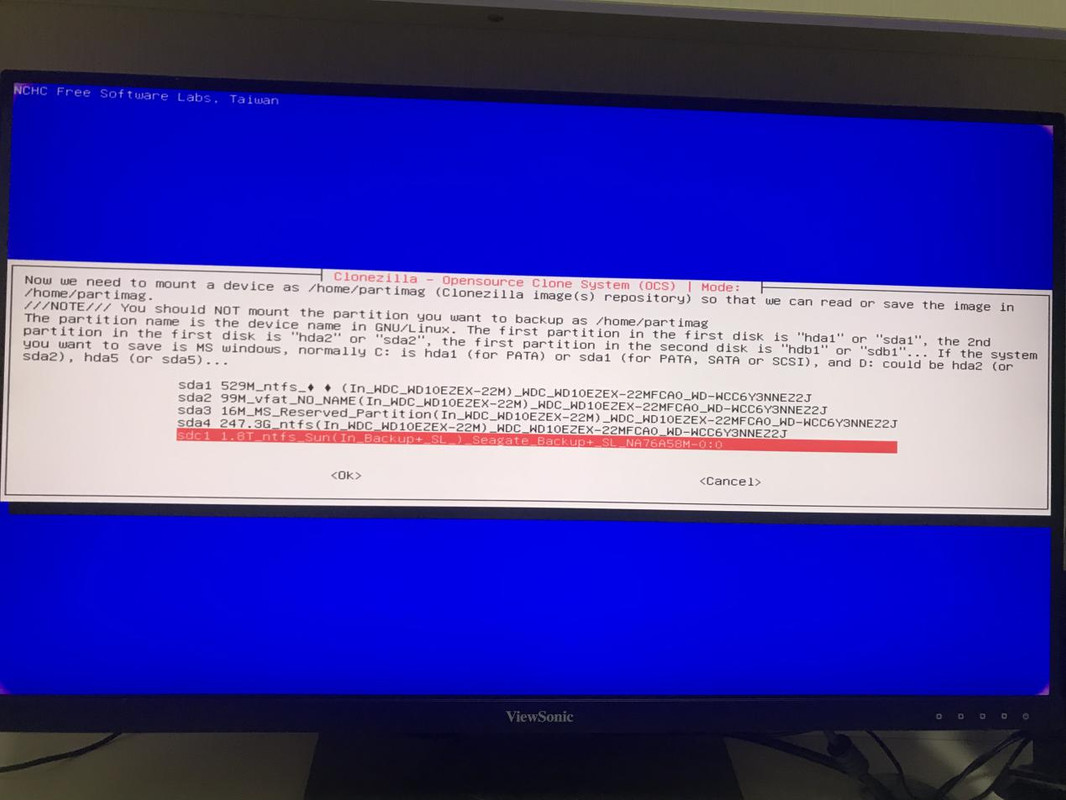
We enter to the next step by pressing Ctrl-C, which is to choose the drive which we want to store the image file. In our case, the drive is the last one(sdc1).
After the chosen the the drive we inserted. We can determine the directory we want to put the image file:
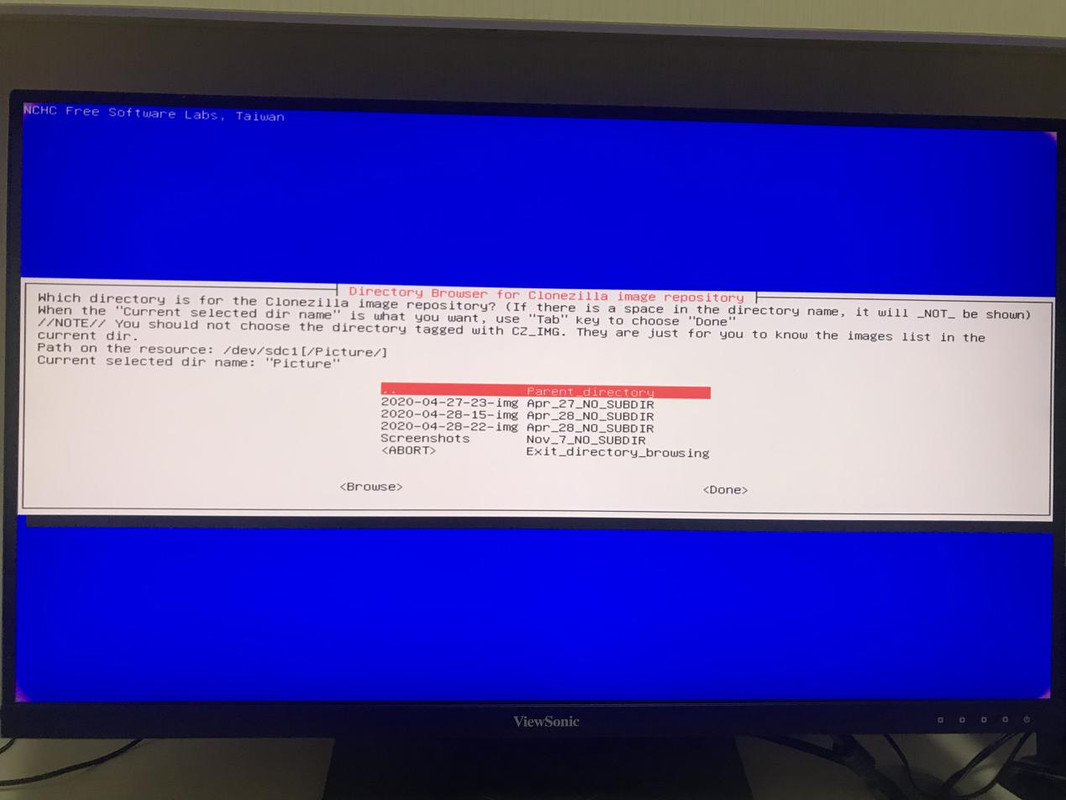
Important note: Don’t choose the directory which use NON-ASCII characters as name like me. It not going to work. Then confirm it.
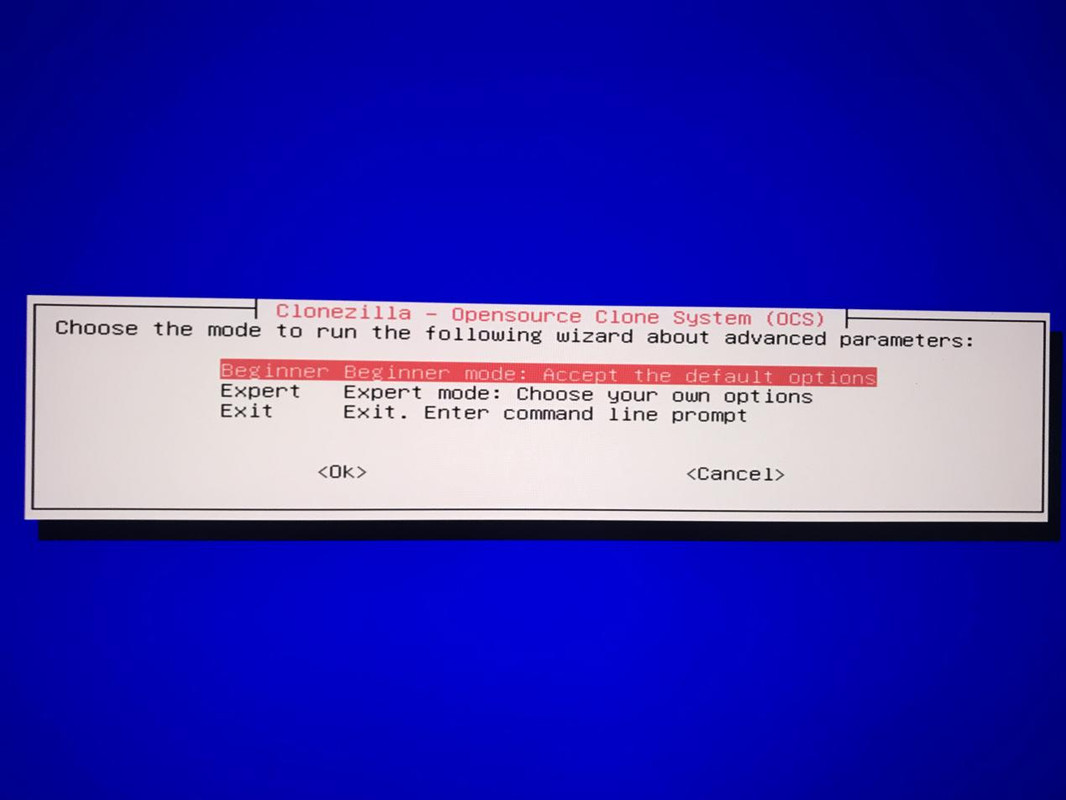
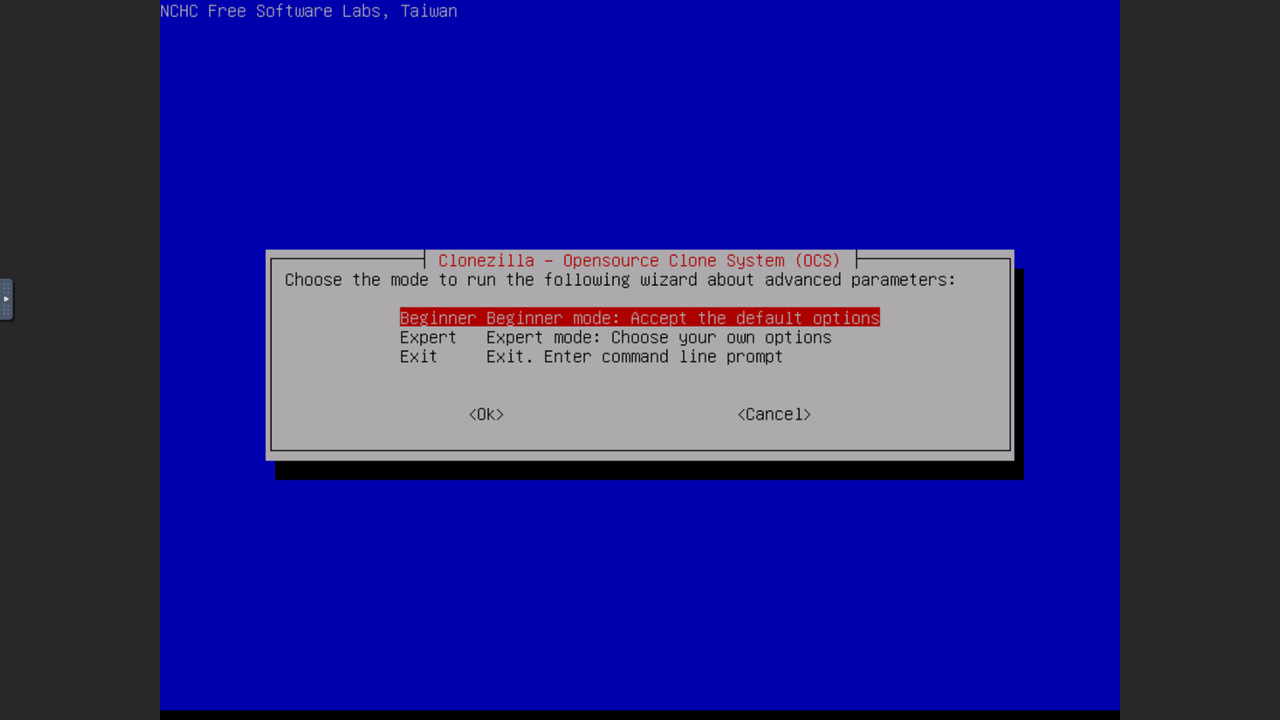
Next clonzilla will ask you which mode you want to use, we choose the Beginner mode in here:
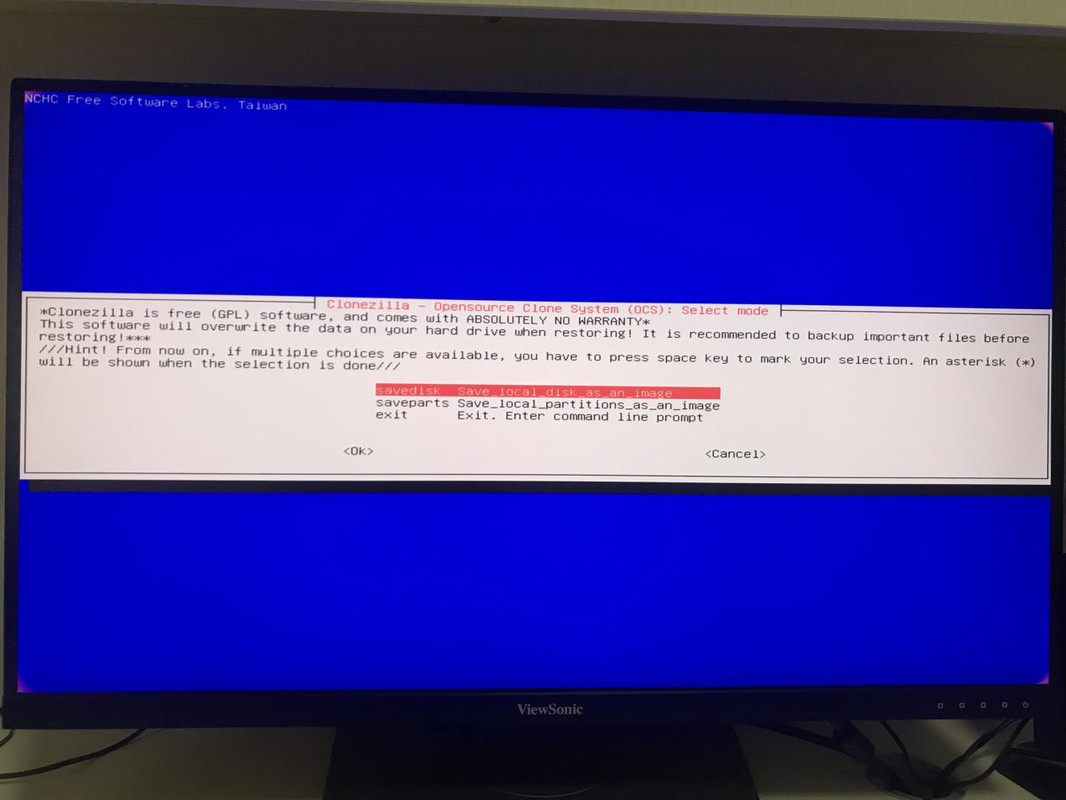
Then save the source machine drive as an image file:
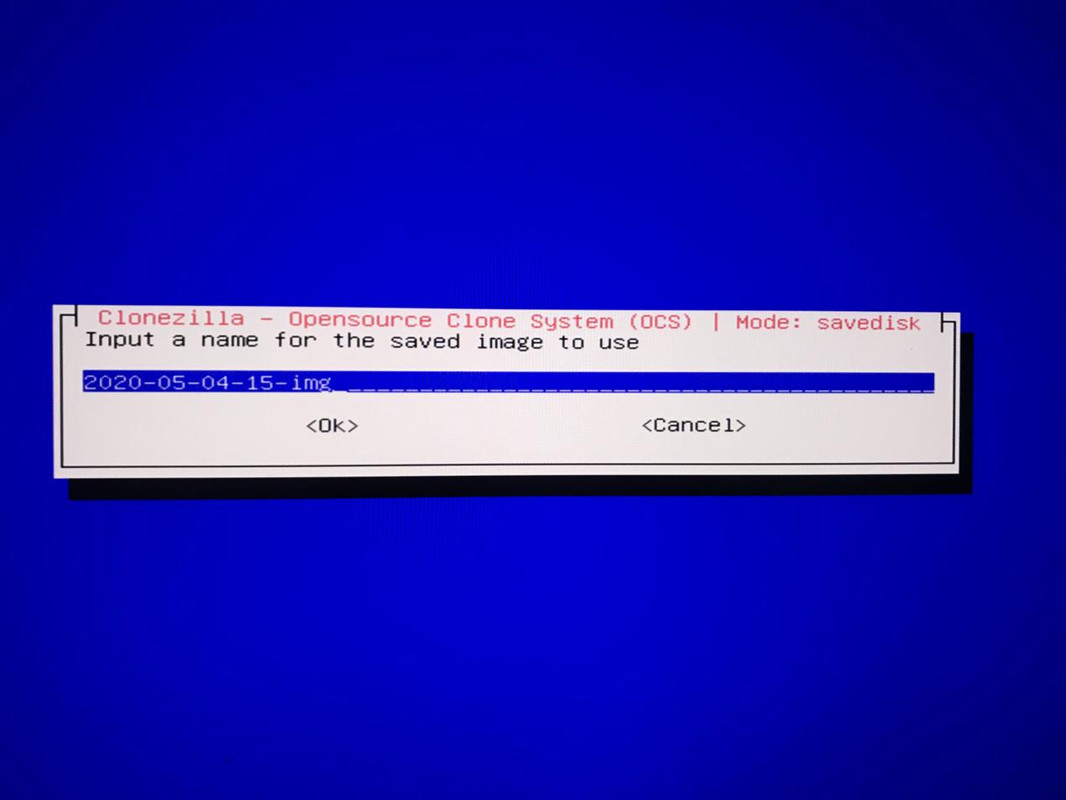
Type the image name:
Choose the disk we want to save:

Note: it's possible that there is only one disk choice but I have both HHD and SSD. Technically, you can choose both to back up your system, but they won't be restored successfully by Clonezilla. Clonezilla can only restore one disk per time. Therefore, you need to select one disk with a bootable system. Generally speaking, the bootable system is in SSD, in this case which actually is nvme0n1.
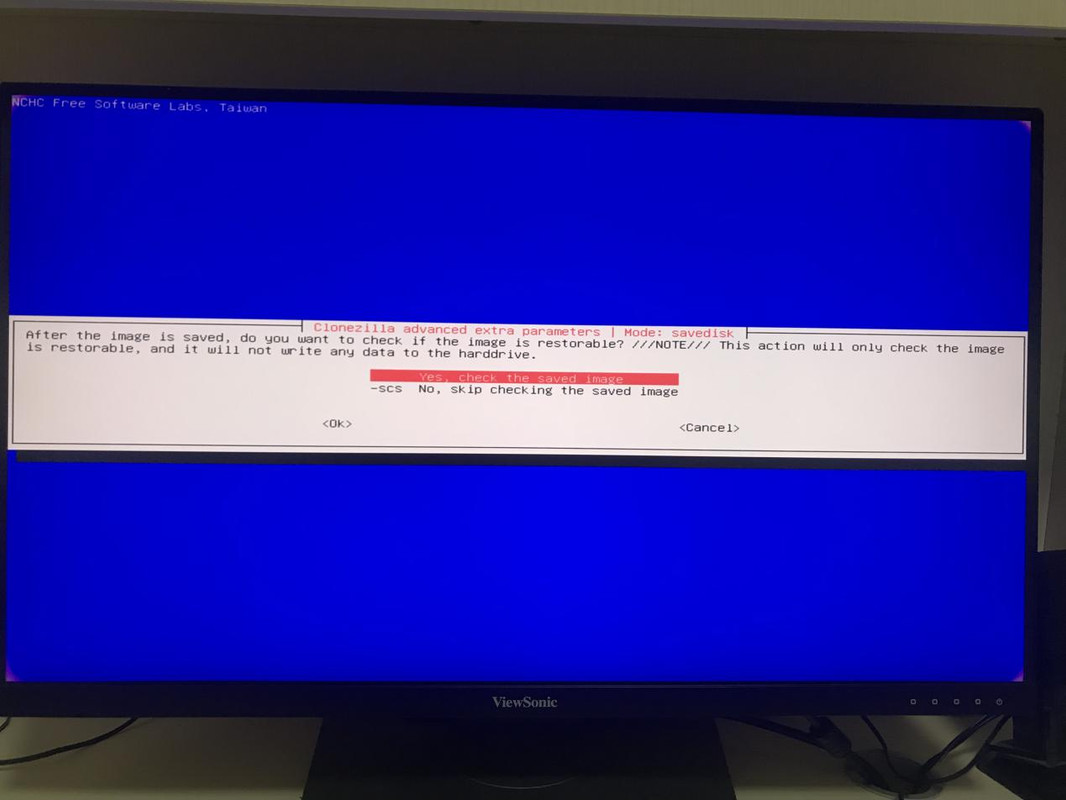
Then Clonezilla will ask after the image file was saved , do you want to check the image file is bootable or not, we choose yes:
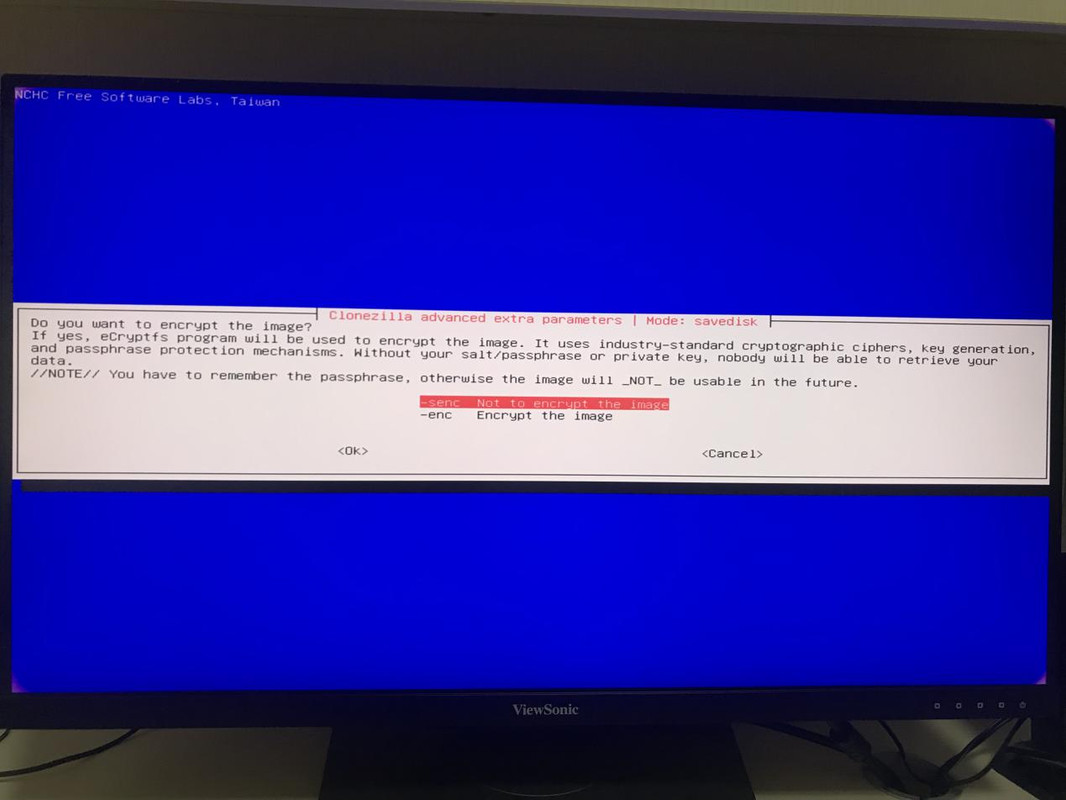
Then choose if we want to encrypt our image file:
After all configuration was confirmed. We are going to copy our hard drive to an image file:

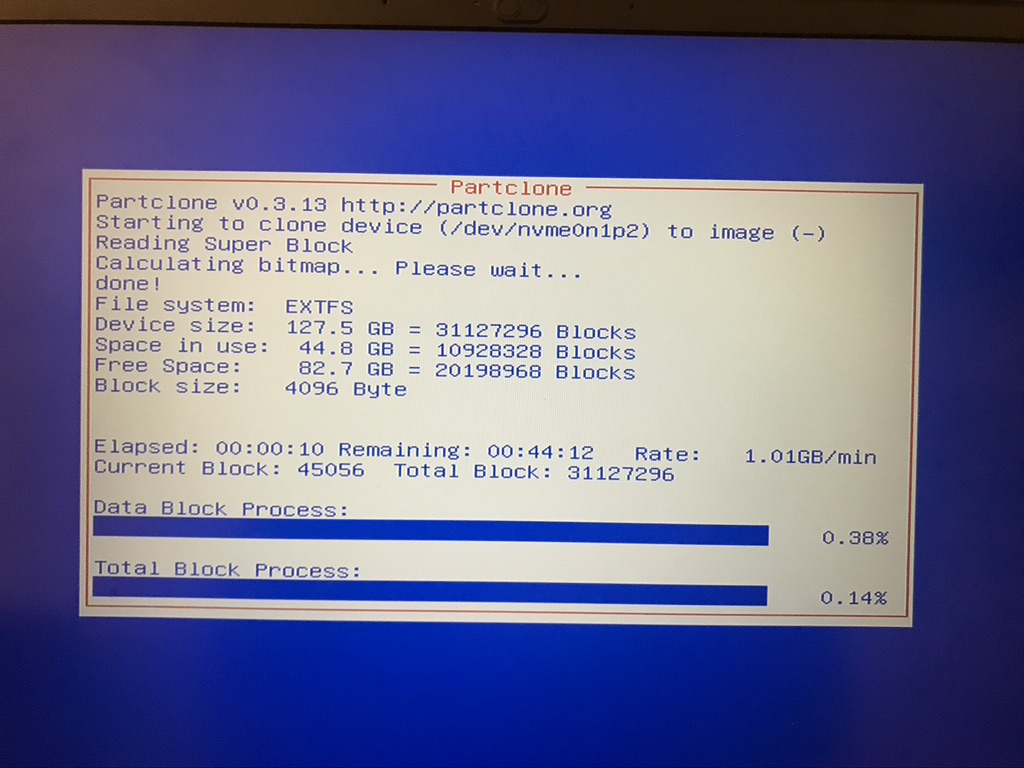
Finally the clone started:
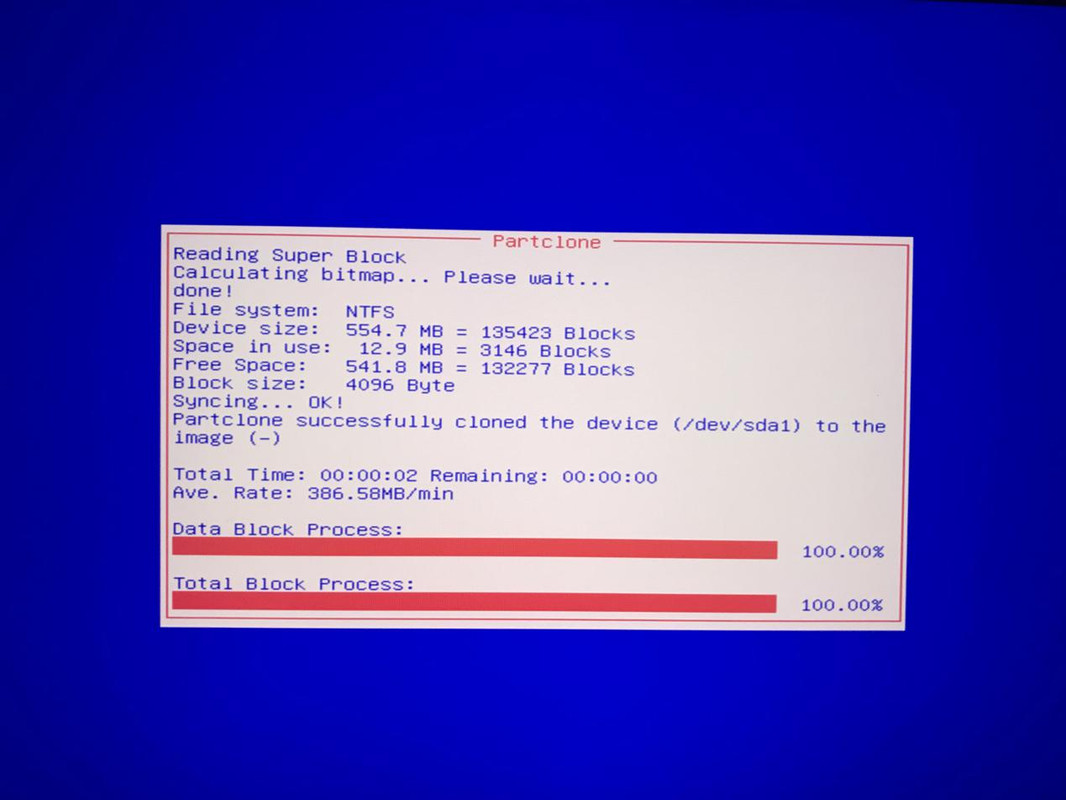

After a longtime waiting, the clone finished successfully:
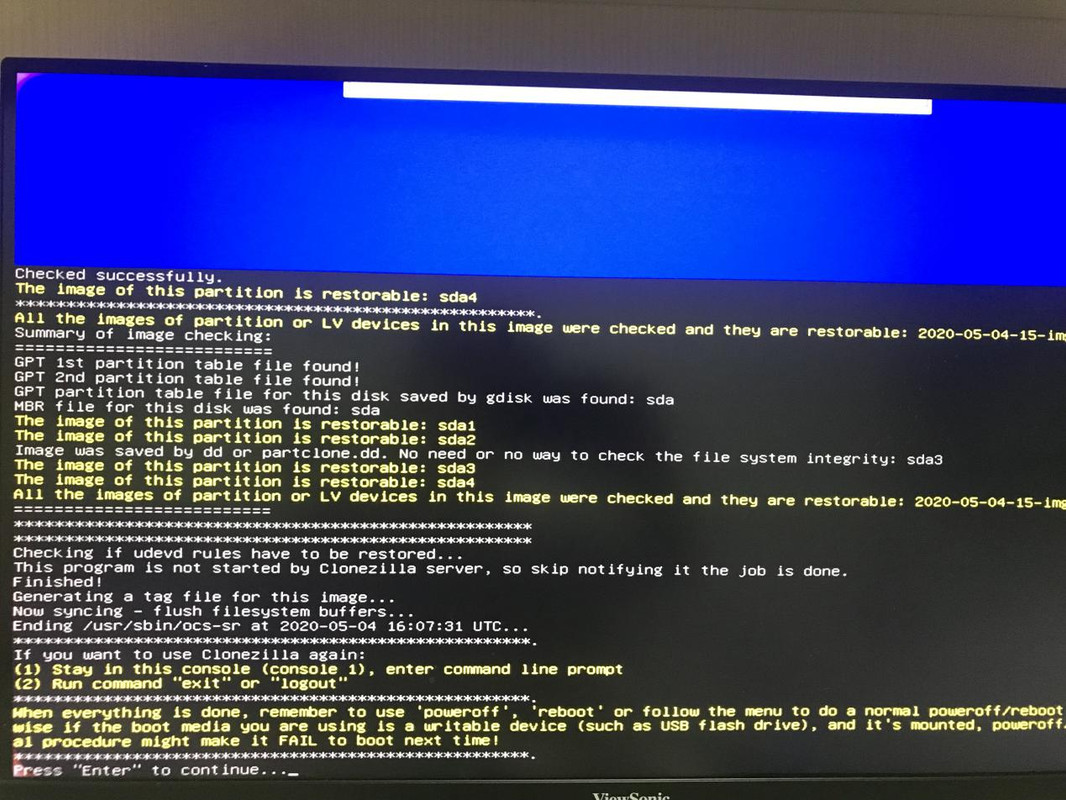
Then you will have a folder named as you typed during the procedure in your hard drive. In this case, the folder is named as 2020-05-04-15-img.
Option 2: Use SSH server to store the image into webrunner (only for small machine)
Storing your image via ssh SSH server can save the step to transfer the image from your hard drive to webrunner, the cloning speed, however, can be very slow. So this approach is only suggested for cloning a small machine.
Firstly, you need to require a SlapOS webrunner from https://slapos.vifib.com/ (international) or https://slapos.xunkongjian.cn/ (in China). In order to do that, you can follow How To Request an ERP5 Instance on a SlapOS Webrunner from the beginning till Access your Webrunner.
As long as access to your webrunner, you are able to use the terminal as well as other functions.
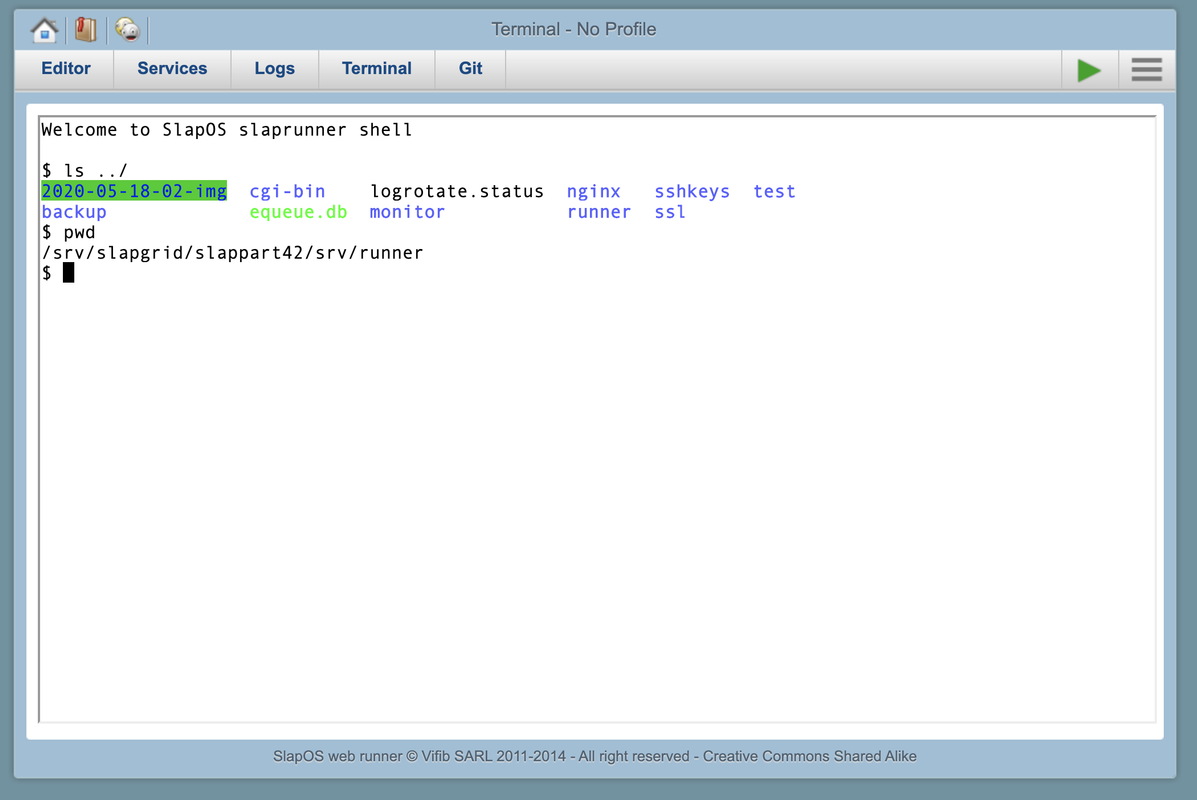
Note: I, personally, stored the image (named 2020-05-18-02-img in the screenshot) in the directory as /srv/slapgrid/slappart42/srv/runner. Technically, you can save it everywhere in the webrunner, but it may cause the error from Clonezilla as “No such file or directory”.
-
Get A Local IPv6 Network on Your Physical Machine
You can follow the tutorial HowTo Get A Local IPv6 Network, either using a Raspberry Pi to boardcast IPv6 or installing Re6st on a Linux . By this means. you can use IPv6 address in Clonezilla which will boot from your source machine so that you are able to connect to the SlapOS webrunner you requested.
-
Run Clonezilla as Before
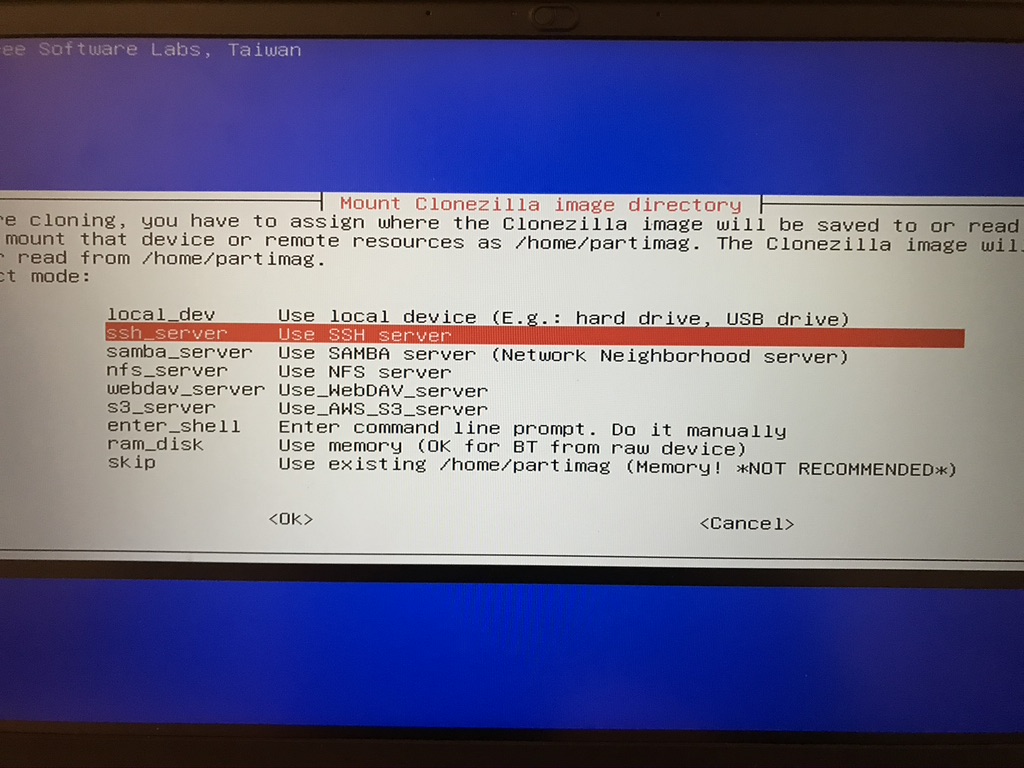
When you get a IPv6 network locally, your Clonezilla is capable of SSH server via IPv6, which means, the SlapOS webrunner you requested is accessible from the Clonezilla on your physical machine. And you can only need to follow the instructions as the paragraphs before Option 1: Use Local Device to Save The Cloned Image (Suggested) assign where the Clonezilla image will be saved.
And choose “ssh_server” this time:
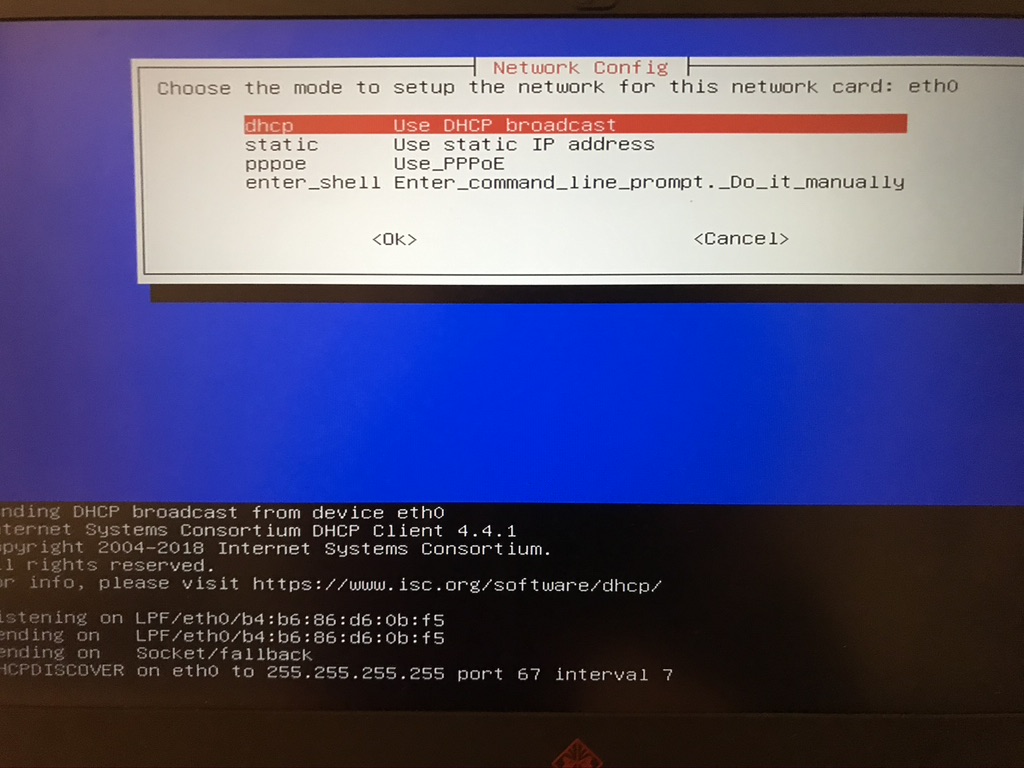
Use DHCP broadcast:
After that, you have to enter shell.
-
Pair SSH keys
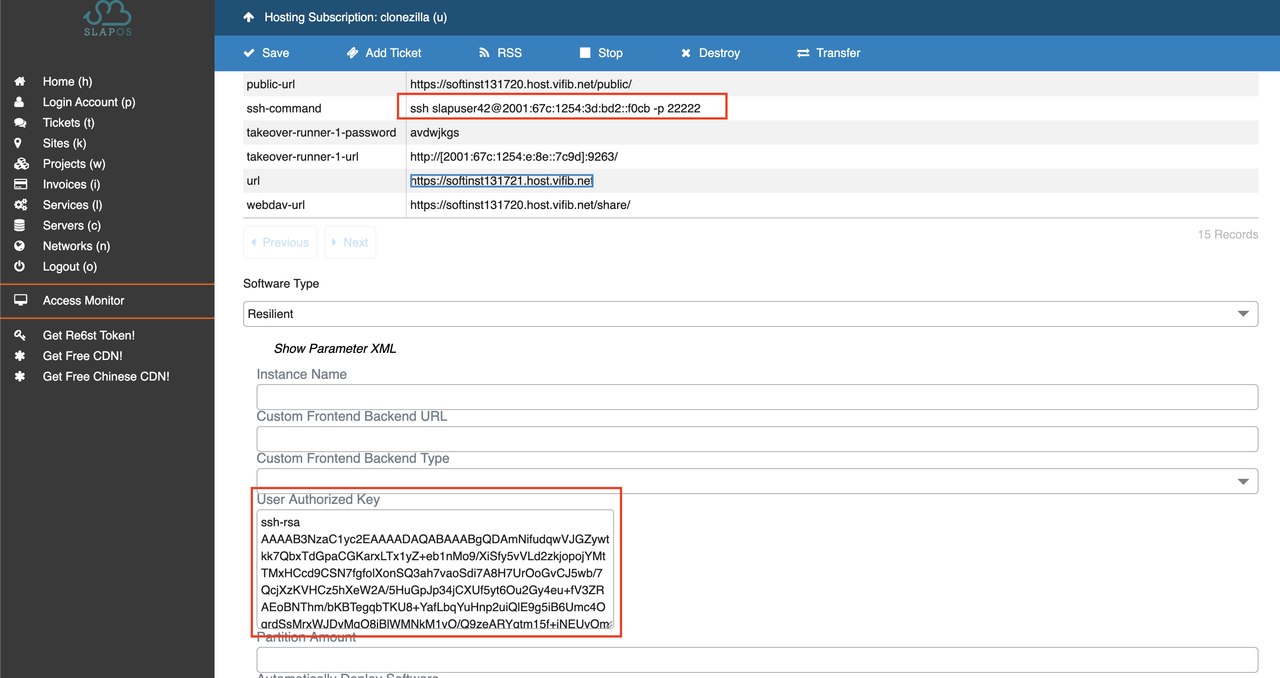
As you can tell from the detail page of your SlapOS webrunner: you are supposed to fill the blank of User Authorised Key with the public key of the authorised device. So that you can SSH to your SlapOS webrunner freely from your authorised device via “ssh-command”.
So how to get the public key from Clonezilla especially as “root”?
First of all, you can simply became “root” in Clonezilla with no password by
sudo su -Then you can generate a pair of SSH key by typing the command:
ssh-keygenIt will ask you where to save the keys, you are allow to always press “enter” to keep it by default.
Having a pair of keys, you are able to copy the public key into “User Authorised Key” on the SlapOS page. Waiting for 5-10mins, the device (the Clonezilla) will be authorised to SSH to the webrunner.
-
Using SSH server
After the pairing, we can exit the command line back to menu by consistently typing
exittill we finally exit. It might require several repeated steps as above until it asks you to type the IP address: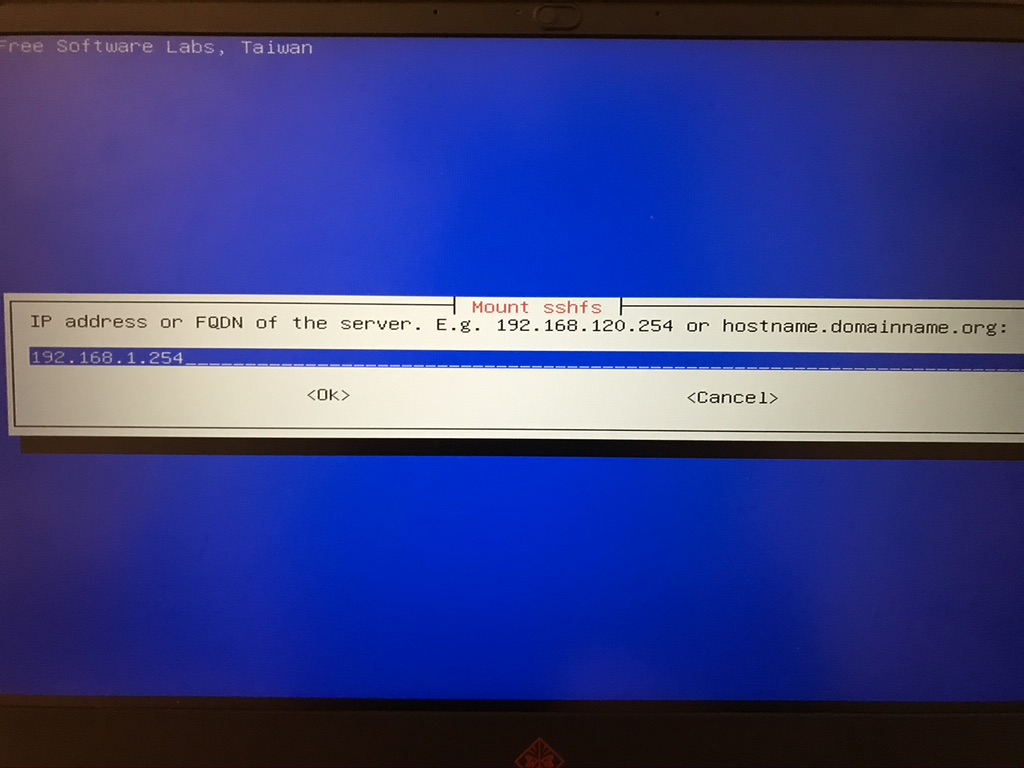
As you noticed on the SlapOS page, we have a ssh-command in Connection Parameters, e.g.,
ssh slapuser42@2001:67c:1254:3d:bd2::f0cb -p 22222Note:
- “slapuser42” is the account
- “2001:67c:1254:3d:bd2::f0cb” is the IP address
- “22222” is the port
Following the command, I type [2001:67c:1254:3d:bd2::f0cb] as IP address(with the brackets).
And the port is “22222”:
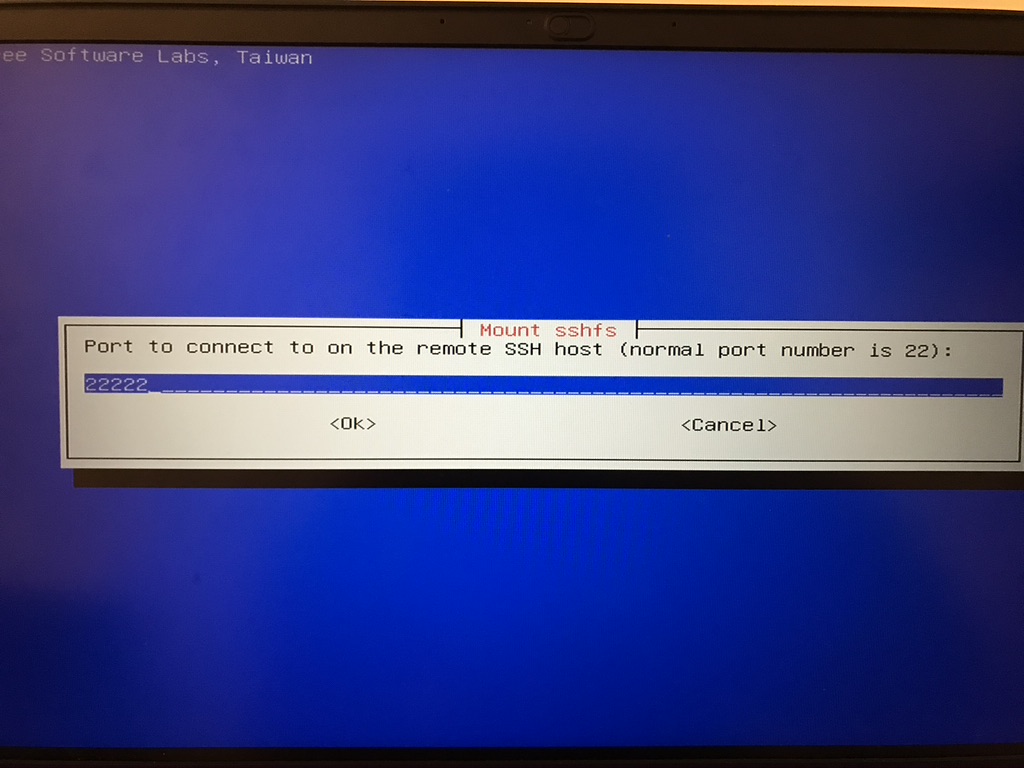
Then the account user regarding to your ssh-command. Mines is “slapuser42”.

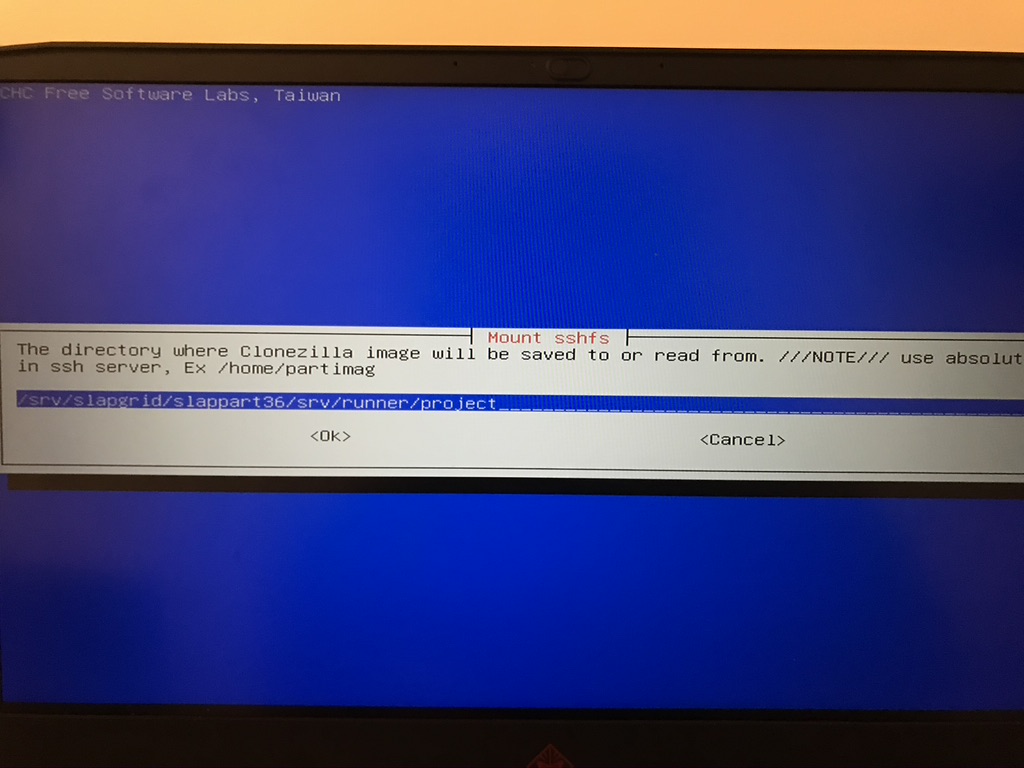
Then it will ask where you want to save the Clonezilla image. You can save to anywhere as long as it can be found, for example: /srv/slapgrid/slappart42/srv/runner
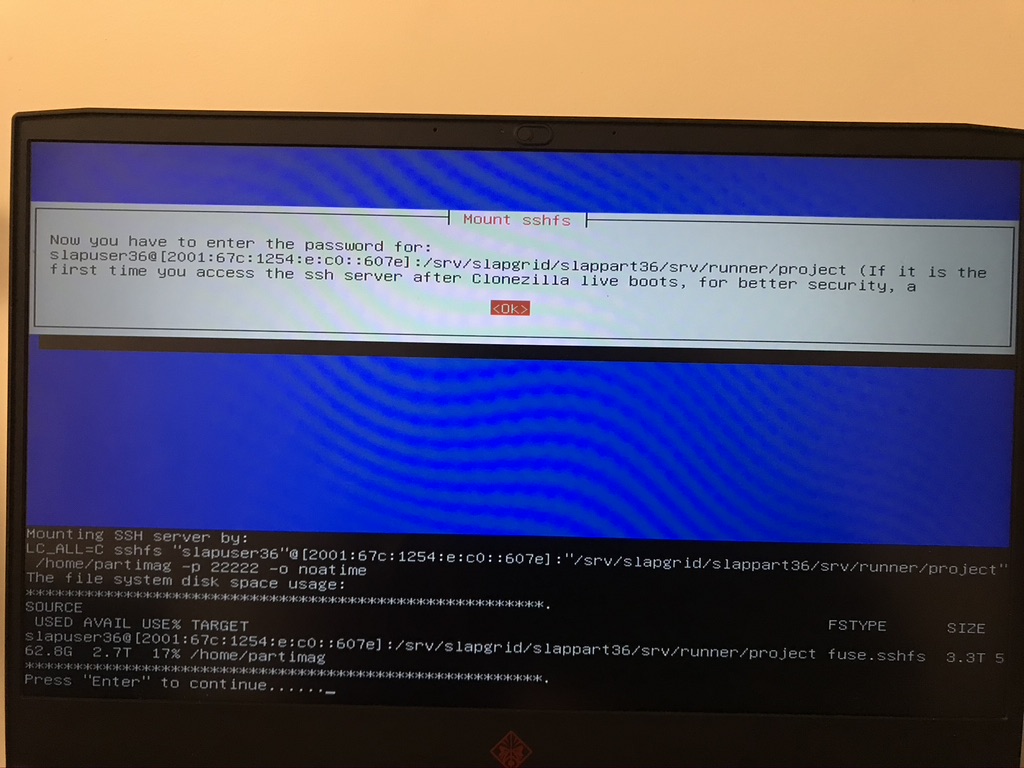
For now, you have already give away all the Informations to use the SSH server. As a mater of fact, the settings above are simply as a
sshfscommand line, which means you can mount it manually:sshfs -p 22222 slapuser42@[2001:67c:1254:3d:bd2::f0cb]://srv/slapgrid/slappart42/srv/runner /home/partimag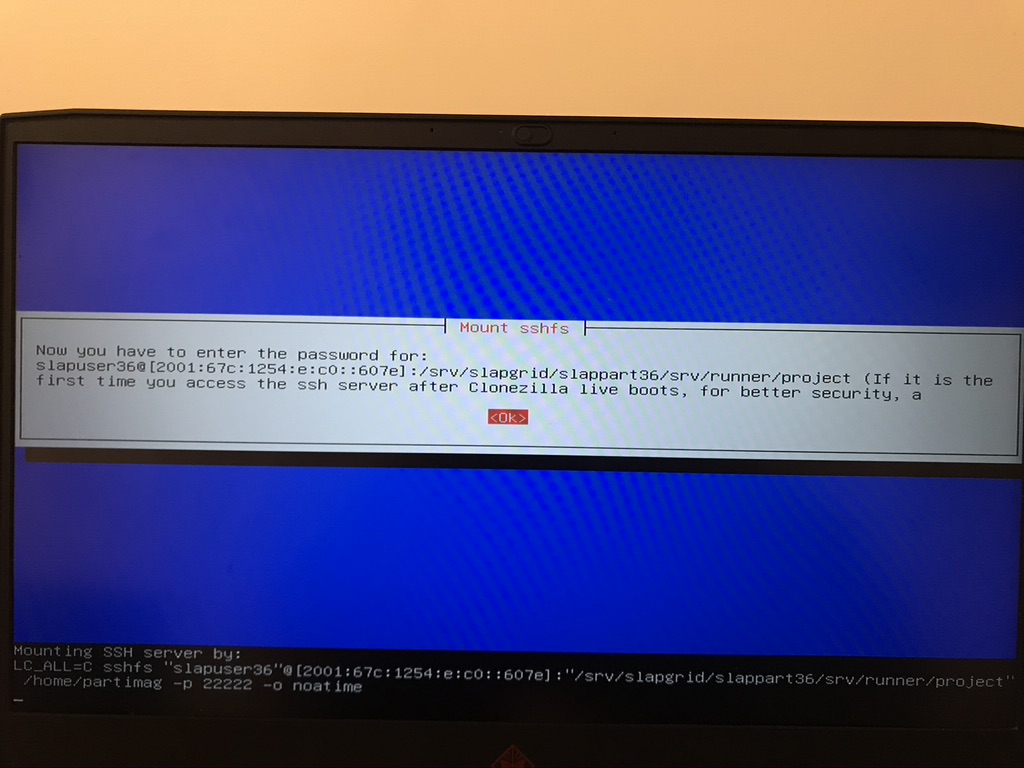
-
Start to clone
After SSH server settings, the rest steps are basically same as Option 1: Use Local Device to Save The Cloned Image (Suggested). You can simply follow the instructions or have a look at the Option 1.
Until the Clonezilla completes, you will have an image folder in your webrunner.
Restore to Rapid.Space VM
- Install Clonezilla Live in KVM
- Prepare the Cloned image in SlapOS Webrunner
- Boot Clonezilla from KVM to Restore
1. Install Clonezilla Live in KVM
Following HowTo Install Operating System, you are able to add a Clonezilla ISO image NBD at:
- clonezilla.nbd.vifib.net
Fill in the NBD hostname or IP with Clonezilla ISO image NBD and stop the VM for 5 minutes then start the service and save, wait for another 5 minutes, you will have the installation image ready.
2. Prepare the Cloned image in SlapOS Webrunner
If you saved your cloned image by SSH server, you can skip this step and go to the next step directly.
If you saved your cloned image by local device, you must have it in your hard disk. To restore it from the Clonezilla in your Rapid.Space VM, the cloned image folder should be placed properly. Generally speaking, Clonezilla supports restoring from a hard drive, but for our Rapid.Space machines, we specially need to do it over network(SSH/SSHFS). So as to establish it, we are supposed to transfer the image from your hard drive to a SlapOS webrunner.
Firstly, you need to require a SlapOS webrunner from https://slapos.vifib.com/ (international) or https://slapos.xunkongjian.cn/ (in China). In order to do that, you can follow How To Request an ERP5 Instance on a SlapOS Webrunner from the beginning till Access your Webrunner.
As long as access to your webrunner, you are able to use the terminal as well as other functions.
Now you should add your machine to the authorised list of the SlapOS webrunner:
As you can tell from the detail page of your SlapOS webrunner: you are supposed to fill the blank of User Authorised Key with the public key of the authorised device. So that you can SSH to your SlapOS webrunner freely from your authorised device via “ssh-command”.
In order to get the public key from your computer, which has been inserted the hard drive, you can generate a pair of SSH key by typing the command:
ssh-keygen
It will ask you where to save the keys, you are allow to always press “enter” to keep it by default.
Having a pair of keys, you are able to copy the public key into “User Authorised Key” on the SlapOS page. Waiting for 5-10mins, the device (your computer) will be authorised to SSH to the webrunner.
Before you transfer the image via scp, you need to check where is your hard disk by fdsik -l. The transfer command can be:
scp -r /local/directory slapuser42@[2001:67c:1254:3d:bd2::f0cb]:/srv/slapgrid/slappart42/srv/runner
When the transfer completes, you can easily check it in your webrunner. Then you can go next to restore the image on your Rapid.Space VM.
3. Boot Clonezilla from KVM to Restore
As you have done at the first step: Install Clonezilla Live in KVM, you need to reboot your VM to change your BIOS to let your machine boot Clonezilla.
Before you press [enter], you can navigate the menu by [up] and [down], so that you will notice that your keyboard is available for it. By pressing [enter], you are supposed to wait 15mins to 1 hour depending on your location.
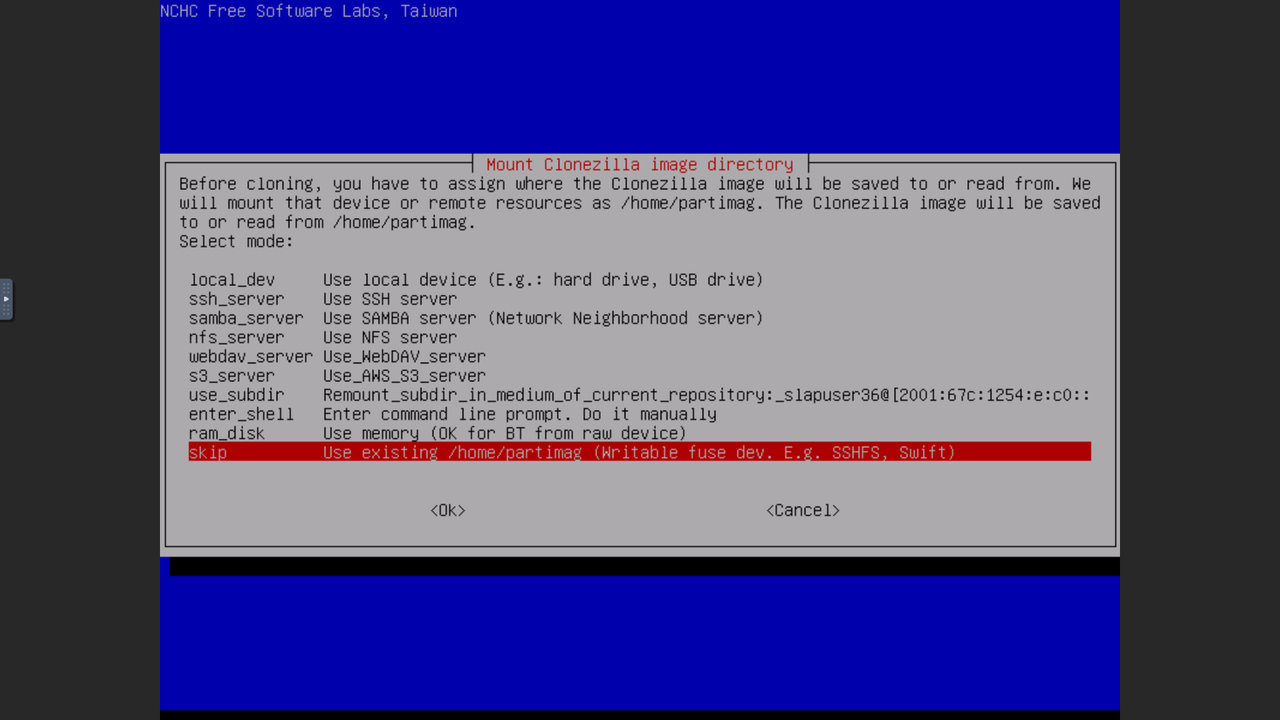
The procedure is similar as saving the image until the step asking you to assign where the Clonezilla image will be saved or read. We should choose “ssh_server” rather than “local_dec” this time:
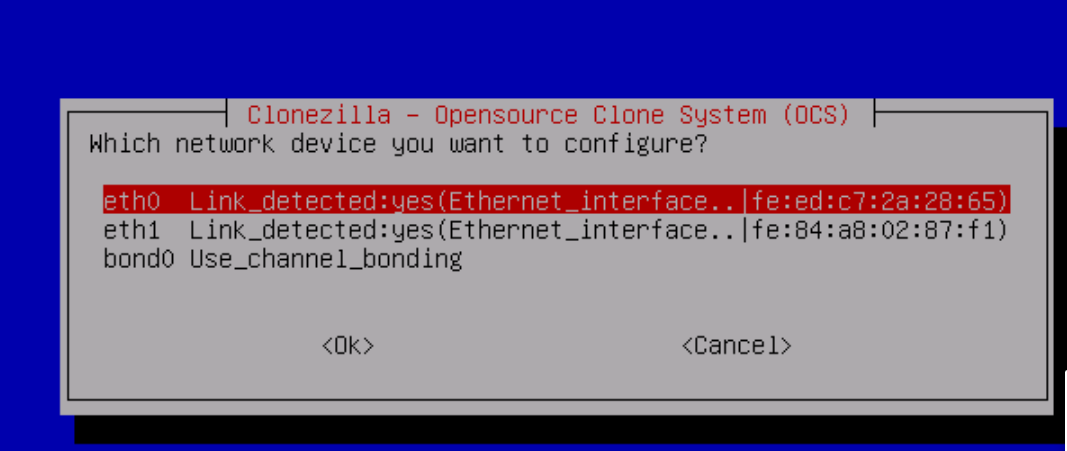
Choose “eth0” as your network device to configure:
Use DHCP broadcast:
After that, you have to cancel the rest dialogues to enter the shell. Because at this moment, you haven't configured your IPv6 address. To realise that, you'd better to refer to How to install Ipv6 to get remote access to the VM.
In short, running the following command inside your VM is enough:
wget -O- http://10.0.2.100/ipv6_config.sh | /bin/sh -
You might need “root” permission:
sudo su -
And restart your ssh service:
service ssh restart
Now you can ssh to your Clonezilla VM remotely, making things simpler.
ssh user@[your_IP] # by default, you can't ssh to a debian OS as a root
Then you can generate a pair of SSH key by typing the command:
ssh-keygen
It will ask you where to save the keys, you are allow to always press “enter” to keep it by default.
Having a pair of keys, you are able to copy the public key into “User Authorised Key” on the SlapOS page. Waiting for 5-10mins, the device (the Clonezilla) will be authorised to SSH to the webrunner.
Until now, you can freely shuttle between the file systems of clonezilla and webrunner. I encourage you to mount the directory manually:
sshfs -p 22222 slapuser42@[2001:67c:1254:3d:bd2::f0cb]://srv/slapgrid/slappart42/srv/runner /home/partimag
More details and alternative way:
After the pairing, we can exit the command line back to menu by consistently typing exit till we finally exit. It might require several repeated steps as above until it asks you to type the IP address:
As you noticed on the SlapOS page, we have a ssh-command in Connection Parameters, e.g.,
ssh slapuser42@2001:67c:1254:3d:bd2::f0cb -p 22222
Note:
- “slapuser42” is the account
- “2001:67c:1254:3d:bd2::f0cb” is the IP address
- “22222” is the port
Following the command, I type [2001:67c:1254:3d:bd2::f0cb] as IP address(with the brackets).
And the port is “22222”:
Then the account user regarding to your ssh-command. Mines is “slapuser42”.
Then it will ask you where Clonezilla want to read from. You should input a readable directory as you exactly save the image, for example: if the image is inside /srv/slapgrid/slappart42/srv/runner, you are supposed to leave the parents directory of the image folder:
For now, you have already give away all the Informations to use the SSH server. As a mater of fact, the settings above are simply as a sshfs command line, which means you can mount it manually as we said before:
sshfs -p 22222 slapuser42@[2001:67c:1254:3d:bd2::f0cb]://srv/slapgrid/slappart42/srv/runner /home/partimag
If you mount the directory manually, you can simply “skip” at this step:
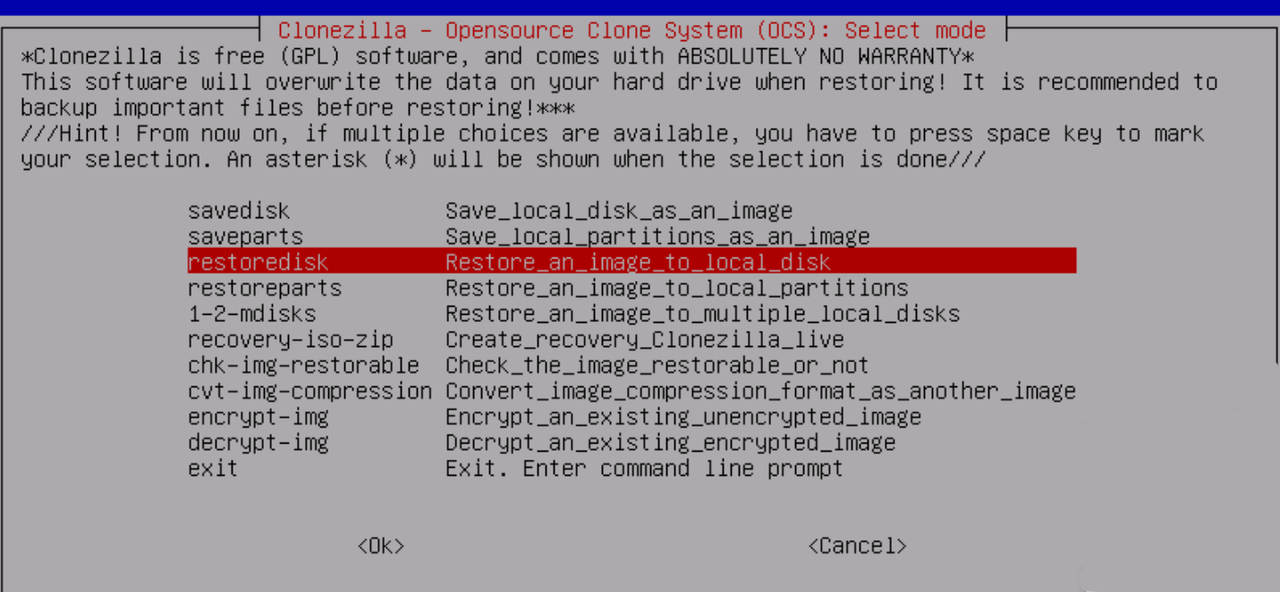
The rest steps are quite similar to “cloning”, the only different part is to choose “restore the image” rather than “save image”.
Let's restore the image to local disk:
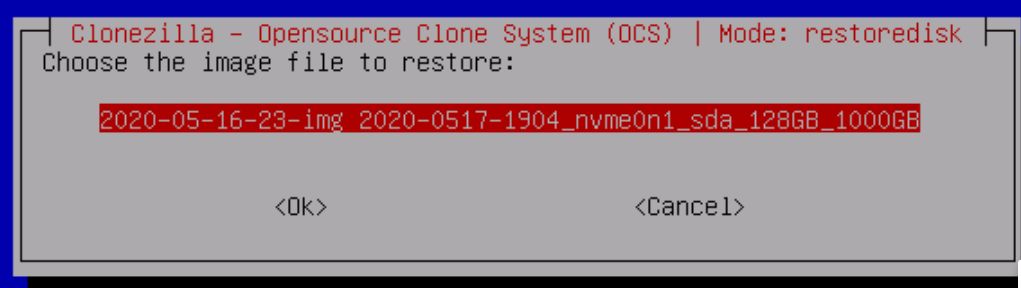
Choose the image file to restore. The image is in your mounted directory:
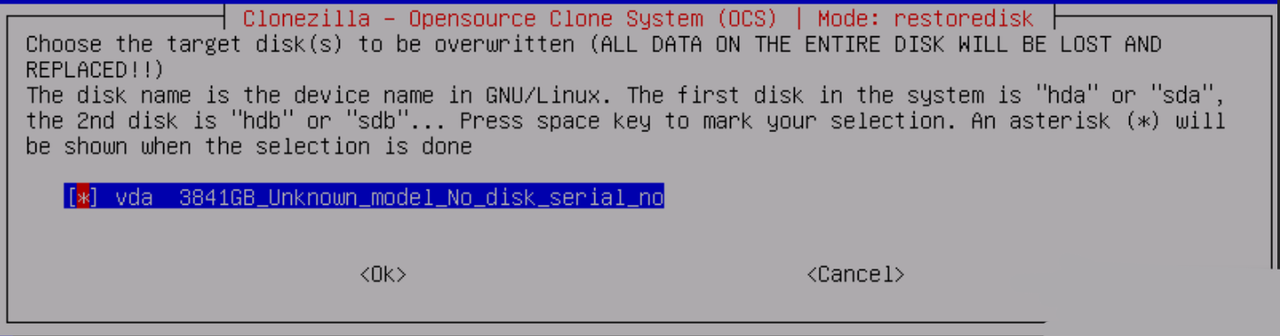
Choose the target disk to be overwritten:
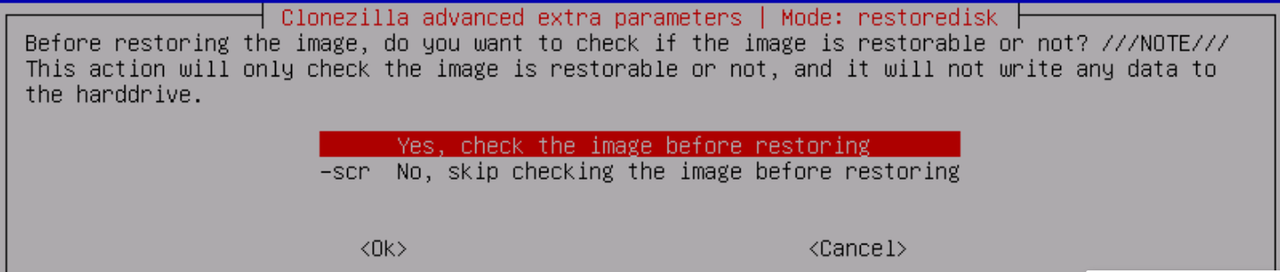
Check the image before restoring:
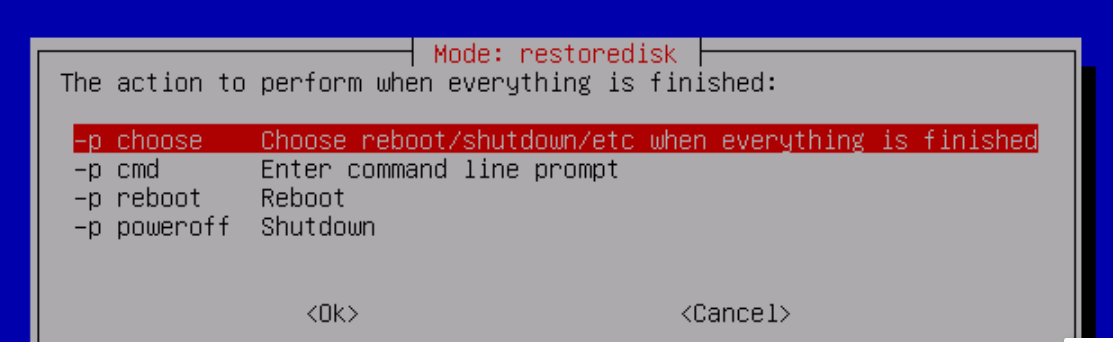
Choose the action to perform when everything is finished:
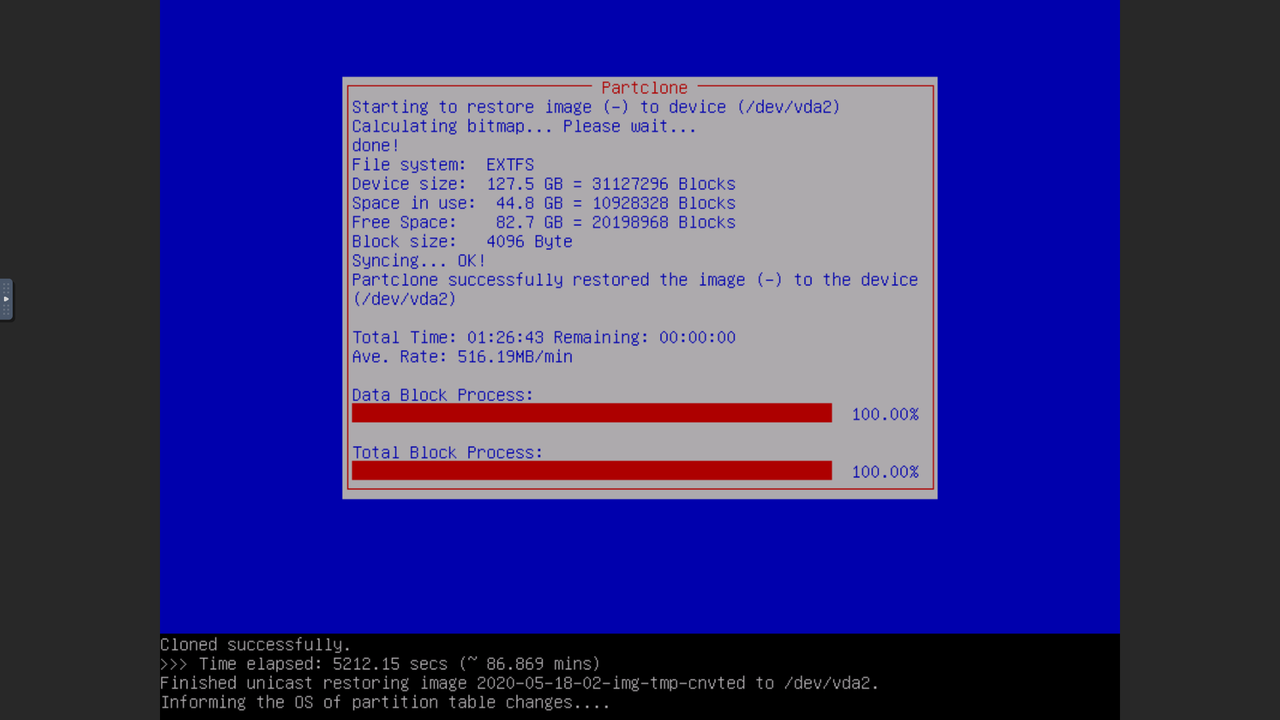
Then wait for a long time… When it is finshed, you can reboot your VM to have your migrated virtual machine.